Apple WatchGPT
I recently purchased an Apple Watch, with two primary goals:
- Track my health, specifically sleep and exercise.
- Build apps.
Having never built anything for the Apple Watch, I was pretty excited to get started and had a ton of ideas. Additionally, it has been almost 10 years since I last programmed in Swift to build a Boxxle Clone.
Recently, I have been following along with all the ChatGPT hype, of which I think is well deserved. You can see other posts I've written about ChatGPT, as well as numerous examples on GitHub to demonstrate the range of problems it is capable of.
The code can be found on GitHub, here.
Features
Supported Versions
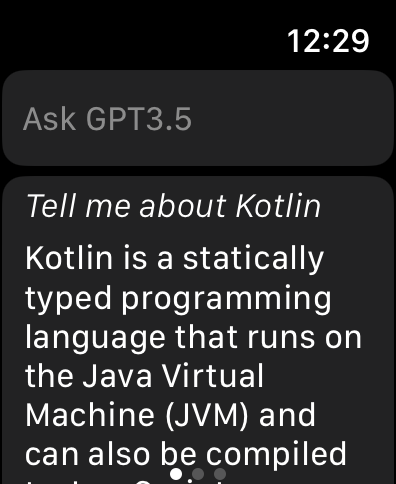
The app currently supports GPT-3, GPT-3.5, and GPT-4 via the /completions and /chat/completions endpoints.
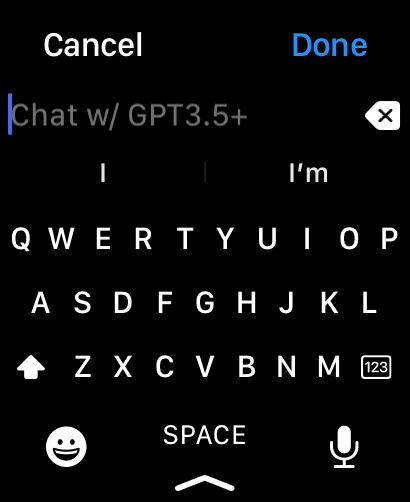
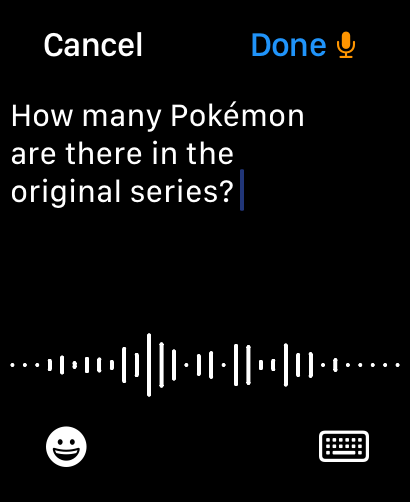
Voice-To-Text
Using the standard keyboard we can select the microphone to initiate voice to text. We can use this to more easily interact with ChatGPT.
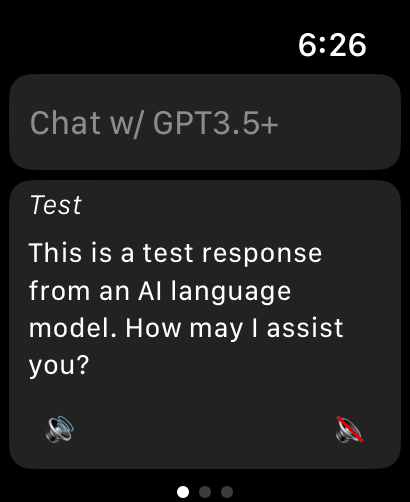
Text-To-Voice
I really wanted to make the app simple enough that even children who can not read are able to use the app. To do this, I decided to explore what it would take to implement Voice-To-Text on iOS/Watch.
Much to my surprise, it was incredibly easy to implement! The process can be broken into three parts.
- The first step was use iOS's
NaturalLanguagelibrary to detect the language.
import Foundation
import NaturalLanguage

class LanguageDetector {
    func detect(text: String) -> String {
        let languageRecognizer = NLLanguageRecognizer()
        languageRecognizer.processString(text)
        if let dominantLanguage = languageRecognizer.dominantLanguage {
            return dominantLanguage.rawValue
        }
        return "en-US"
    }
}
- The second step is to use iOS's
AVSpeechSynthesizerto perform the actual Voice-To-Text feature.
import Foundation
import AVFoundation

class TextToSpeech {
    private let synthesizer: AVSpeechSynthesizer = AVSpeechSynthesizer()

    init() {
        do {
            try AVAudioSession.sharedInstance().setCategory(AVAudioSession.Category.playback)
            try AVAudioSession.sharedInstance().setActive(true)
         }
        catch {
            print("Fail to enable AVAudioSession")
        }
    }

    func stopSpeaking() {
        if (isSpeaking()) {
            synthesizer.stopSpeaking(at: .immediate)
        }
    }

    func isSpeaking() -> Bool {
        return synthesizer.isSpeaking
    }

    func speak(text: String) {
        let utterance = AVSpeechUtterance(string: text)
        utterance.volume = 1.0

        let languageDetector = LanguageDetector()
        let language = languageDetector.detect(text: text)
        let voice = AVSpeechSynthesisVoice(language: language)
        utterance.voice = voice

        synthesizer.speak(utterance)
    }
}
- The final step was to add a "🔊" button to trigger the Text-To-Voice feature.
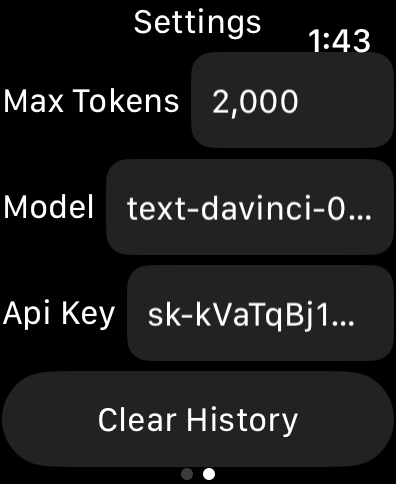
Settings + Other Models
The app supports multiple settings such as:
- Set response Max Tokens
- Toggle models used in Chat Completions API (GPT-3.5 + GPT-4)
- Toggle models used in Completions API (GPT-3.0)
- Set API Key
- Toggle whether to pass historical messages along as context. (Required if you want to maintain a conversation with ChatGPT)
- Clear History
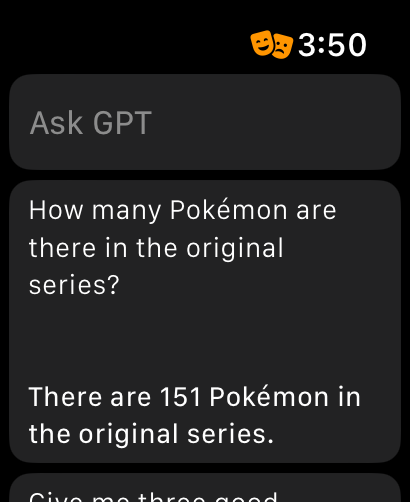
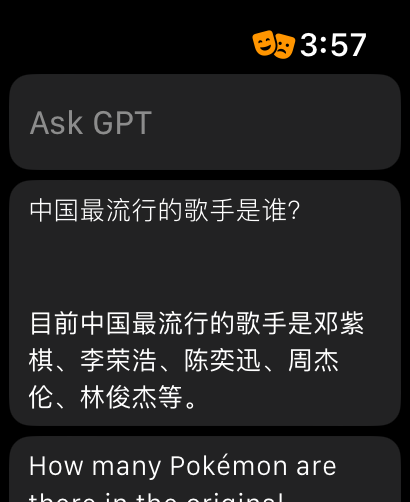
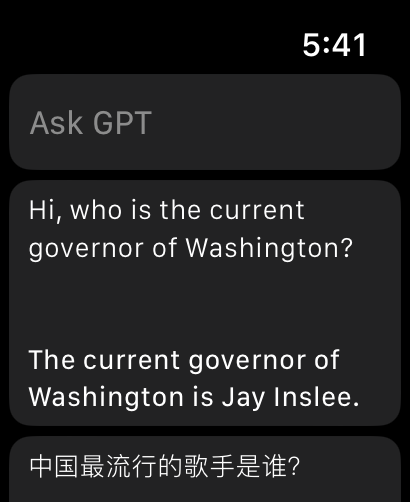
Questions - Misc
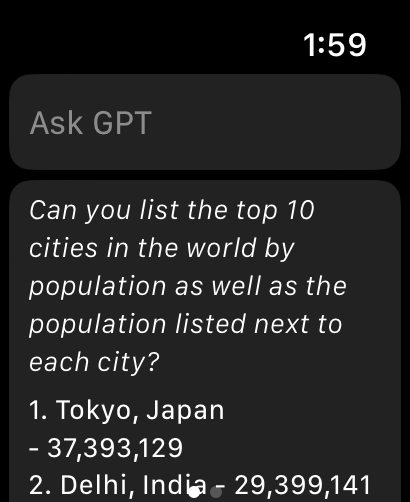
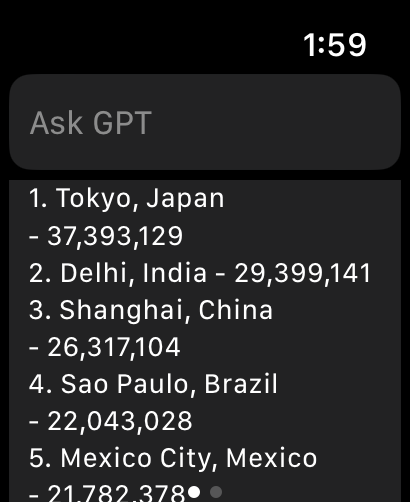
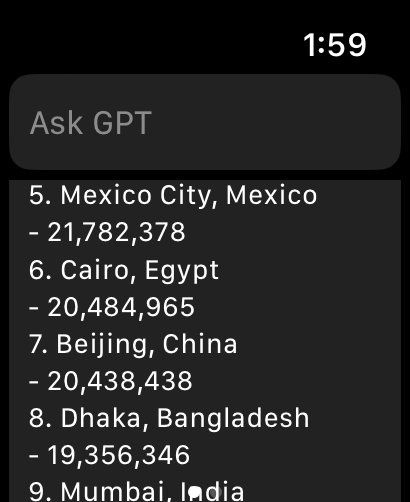
Questions - Top World Cities by Population
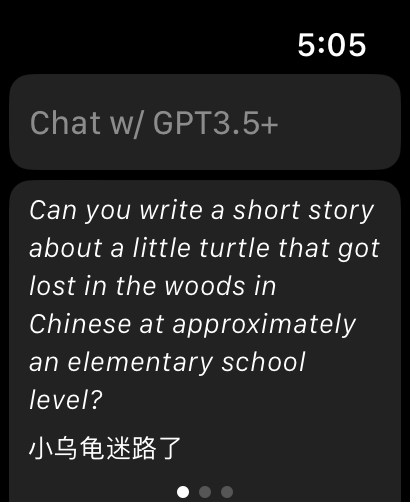
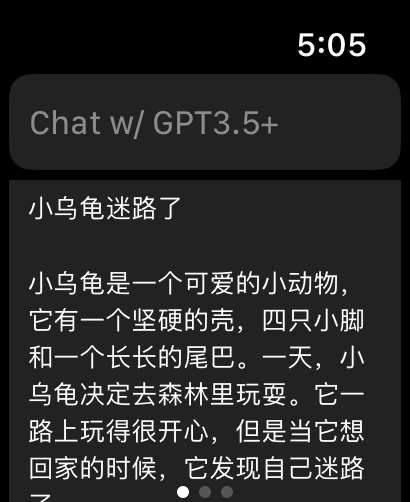
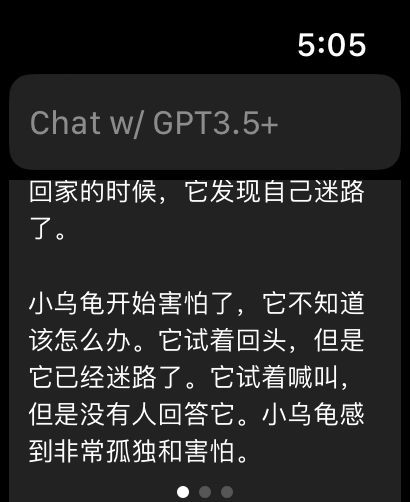
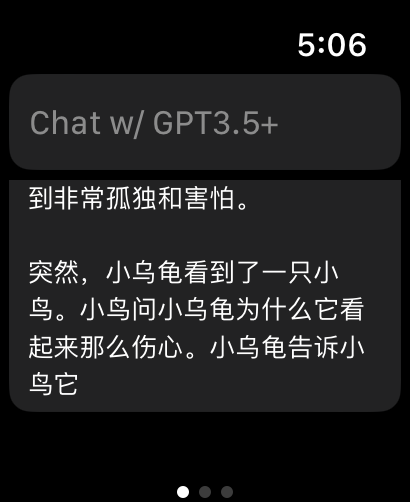
Questions - Children's Short Story about a Turtle in Chinese
 Arrived
 Ninja Turdle
 Twitch